The Slideshow Creator allows you to create a video from your images with music, making it easy to share a polished slideshow with your clients.
To upload or embed videos, see Uploading and Connecting Videos in Workspace.
Accessing the Slideshow Creator
- In Workspace, go to the top navigation menu.
- Select Website.
- Click Slideshow Creator.
- Click Create Slideshow.
Step 1: Set Up Your Project
Enter the basic details:
- Project Name
- Source Gallery
Choose how to load your images:
- Load Selected Collection – loads all images from the selected gallery
- Choose from Selected Gallery – manually select images
Step 2: Set Your Slide Defaults
These settings apply to the entire slideshow (you can edit individual slides later):
- Autoplay
- Captions
- Default Duration
- Default Transition
- Default Motion
- Aspect Ratio
- Frame Background Colour
- Image Fit
- Exit Message
Exit Message
Displayed at the end of your slideshow. You can include:
- A thank you message
- Your studio name
- Credits
Customise the:
- Font
- Font Size
Music
- Select your music track
- Use Beat Syncing to match slide timing to the music
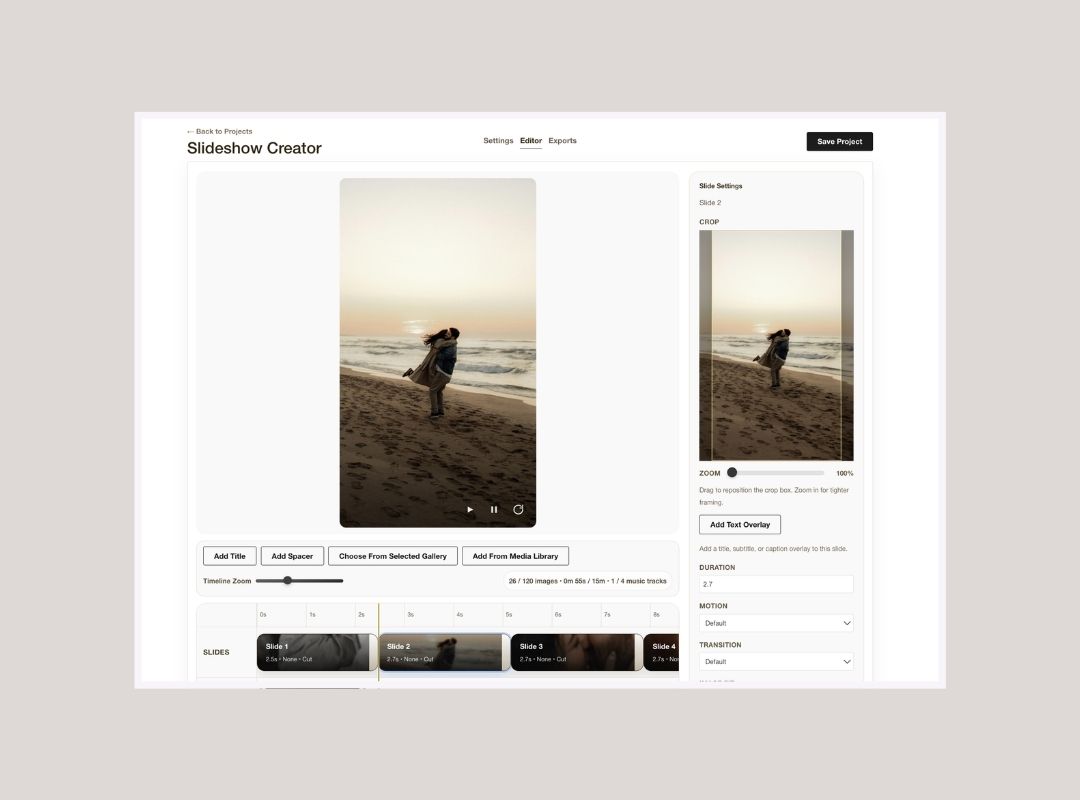
Step 3: Open the Editor
Click Editor in the top left corner to begin editing.
Editing Your Slideshow
Available Tools
- Add Title – adds text overlays
- Add Spacer – inserts a blank slide
- Choose from Selected Gallery – adds gallery images
- Add from Media Library – adds media library images
Adjusting Individual Slides
Click a slide to adjust:
- Crop
- Text Overlay
- Duration
- Motion
- Transition
- Image Fit
- Feature Slide
You can also drag slide edges in the timeline to adjust duration.
Batch Editing Slides
- Hold Shift + Click to select multiple slides
- Apply changes to all selected slides
Creating Group Slides
Group slides allow multiple images to appear together.
- Select multiple slides (Shift + Click)
- Click the Group Tool
- Choose:
Create Group – images appear at the same time
Progressive Group – images appear sequentially, ending together
Adjusting Group Layout
- Select the group in the timeline to open the Group Editor
Exporting Your Slideshow
Step 1: Export Settings
- Click Exports at the top of the screen.
- Set:
- Render Quality
- Export Quality
- Watermark Settings
- Click Render MP4.
Step 2: Download Your Slideshow
Rendering may take a few minutes. You’ll receive an email when it’s ready
You can then:
- Use the email link
or
- Click Download in Export Status(if still open)
Track progress anytime in Export Status at the bottom of the screen.
Connecting a Slideshow to a Gallery
- Open the gallery used to create the slideshow.
- Click Settings (cog icon).
- Scroll to Embed Videos.
Your slideshow will automatically appear if it was created from this gallery.
Display Options
Choose how your slideshow appears:
- Set as Featured Video
- Add to Video Page
- Embed in Gallery(alongside images)