
The Slideshow Creator lets you turn images from a Workspace gallery into a polished slideshow with music, transitions and motion. You can render the finished slideshow as an MP4, then connect it to the relevant Client Gallery.
If you want to upload an existing video instead, see Delivering video with Workspace.
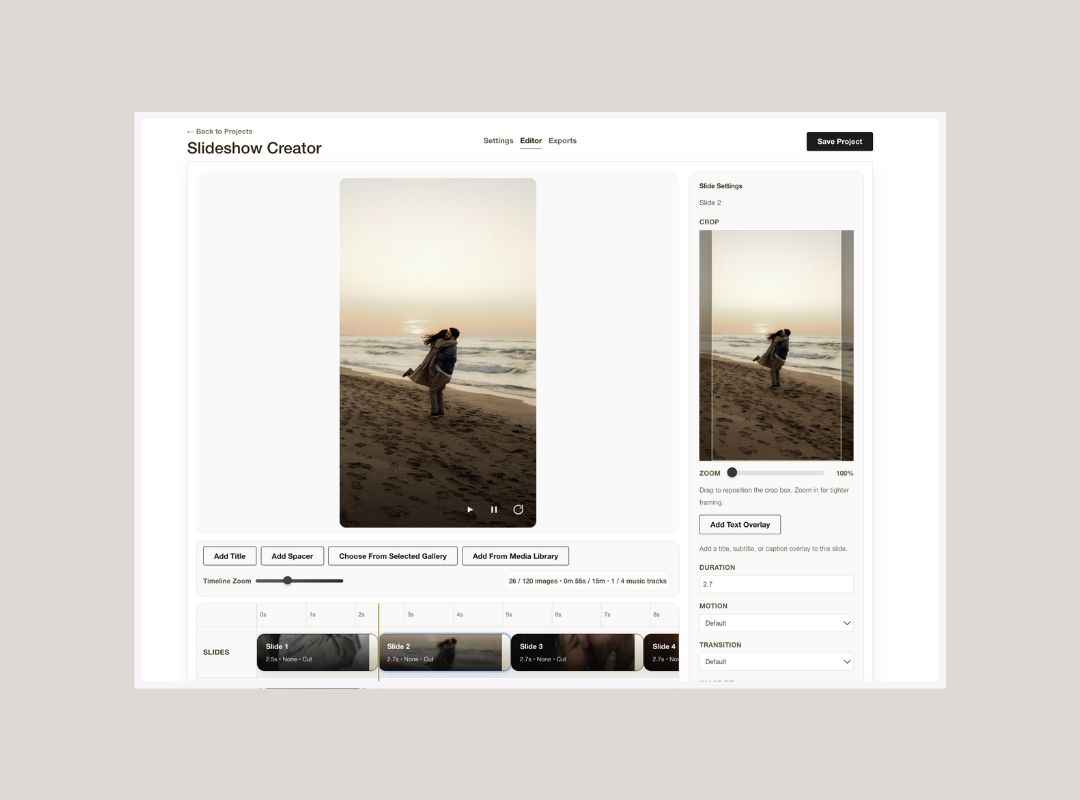
Create a slideshow project
- Go to Website > Slideshow Creator.
- Create a new project and give it a clear name.
- Select the Source Event and Collection containing the images you want to use.
- Select Load Selected Collection to add every image from that collection, or Choose From Selected Gallery to select individual images.
The source gallery also connects the finished slideshow to the correct client work, so check that you have selected the right event and collection before you begin.
Choose the slideshow defaults
The project settings apply automatically to new slides. Set these before arranging the slideshow so you have a consistent starting point:
- Autoplay controls whether the slideshow starts automatically when viewed.
- Show Captions controls whether image captions are displayed.
- Default Duration sets how long each new slide is shown.
- Default Transition controls how one slide changes to the next.
- Default Motion and Motion Intensity control movement within each slide.
- Aspect Ratio sets the shape of the finished slideshow.
- Frame Background sets the colour around images when required.
- Image Fit lets you show the entire image or fill the canvas by cropping it.
You can also add an exit message and adjust its font and size.
Build and arrange the timeline
Drag images into the order you want. You can also use the timeline tools to add title slides, spacers or more images from the selected gallery or your Media Library.
Use Create Group when several images should appear together. Create Progressive Group can reveal images progressively within a grouped sequence. Review grouped slides carefully so that important parts of each image remain visible.
Workspace saves your project automatically, and you can also select Save Project before leaving the editor.
Add music and match the timing
Choose music for the slideshow, then adjust the Start Offset if the track should begin at a different point. Use the slide timing controls to set the pace.
Auto Match Slides can adjust the slideshow timing to suit the selected music. Review the result afterwards and make any changes needed for important images, titles or grouped slides.
Preview the complete slideshow
Play the slideshow from beginning to end before rendering it. Check:
- the image order and pacing
- cropping and image fit
- transitions, motion and grouped slides
- title slides, captions and the exit message
- music timing and volume
- the selected aspect ratio
A short review helps catch presentation issues before the MP4 is created.
Render the MP4
- Open Exports.
- Choose the required quality: HD, Full HD or 4K.
- Choose whether to add a watermark. You can use no watermark, place your studio logo at the bottom left, or use your account watermark settings.
- Confirm the export dimensions shown for the selected aspect ratio and quality.
- Select Render MP4.
Rendering happens in the background. Workspace will email you when it is complete, and you can return to Export Status to download the finished file.
Connect the slideshow to a Client Gallery
Slideshow exports created from a gallery will appear in that gallery's video settings automatically.
- Open the Client Gallery.
- Select the Settings cog.
- Open Embed Videos.
- Choose how the slideshow should be displayed. You can set it as the featured video, add it to the video page or embed it in the gallery.
- Save your changes and check the gallery from the client view.
This keeps the slideshow, photographs and other gallery content together in one client experience.


